
Today we are going to reupholster two of my favorite POANG chairs from IKEA. I picked up the black on from some people who were moving (for free!) but I was not about to use their worn and bulky sheepskin cover that came with it. The brown chair and ottoman was mine and I decide it too could use a fresh update.
The black chair got a full overhall, which was harder than I thought it would be. For the brown chair I simply made a cover to go over the existing chairs fabric. If you have the original cover for the chair and you don't mind just putting something over it (i.e. its not someone else's gross matted sheepskin cover) I would highly recommend this, its way easier.
What you will need:
-A chair to reupholster (obviously)
-Probably about 2 yards of 60in width fabric (varies by chair style slightly, and whether or not you have the ottoman)
-any cording or edging that you want (I made my own, again, not the easiest route...but it can be done)
-batting (if you are stripping the cushions down to foam, the blue chair I did this, the gray chair I did not so the batting wasn't necessary)
-Sewing machine, thread, pins.
I also added some contrasting throw pillows, full tutorial on this type of pillow can be found here
Steps:
1) First I deconstructed the sheepskin covers I got with the black chair. I salvaged the zippers and the velcro. Ended up not using either for this project, maybe another project!


2) The next thing I did was to prepare the cording I would use as and edging. I made it out of black fabric I had left over from the lining of the elastic waistband skirt here. I cut the black fabric about 2.5 inches wide, and as long as I could. Obviously I didn't have a single piece that was long enough, but it was easy enough to daisy chain the fabric along. The cord I used was just some 3/8in rope I had. Most fabric stores sell remade edging like this, this would be a lot less work, and I would probably do this in the future.


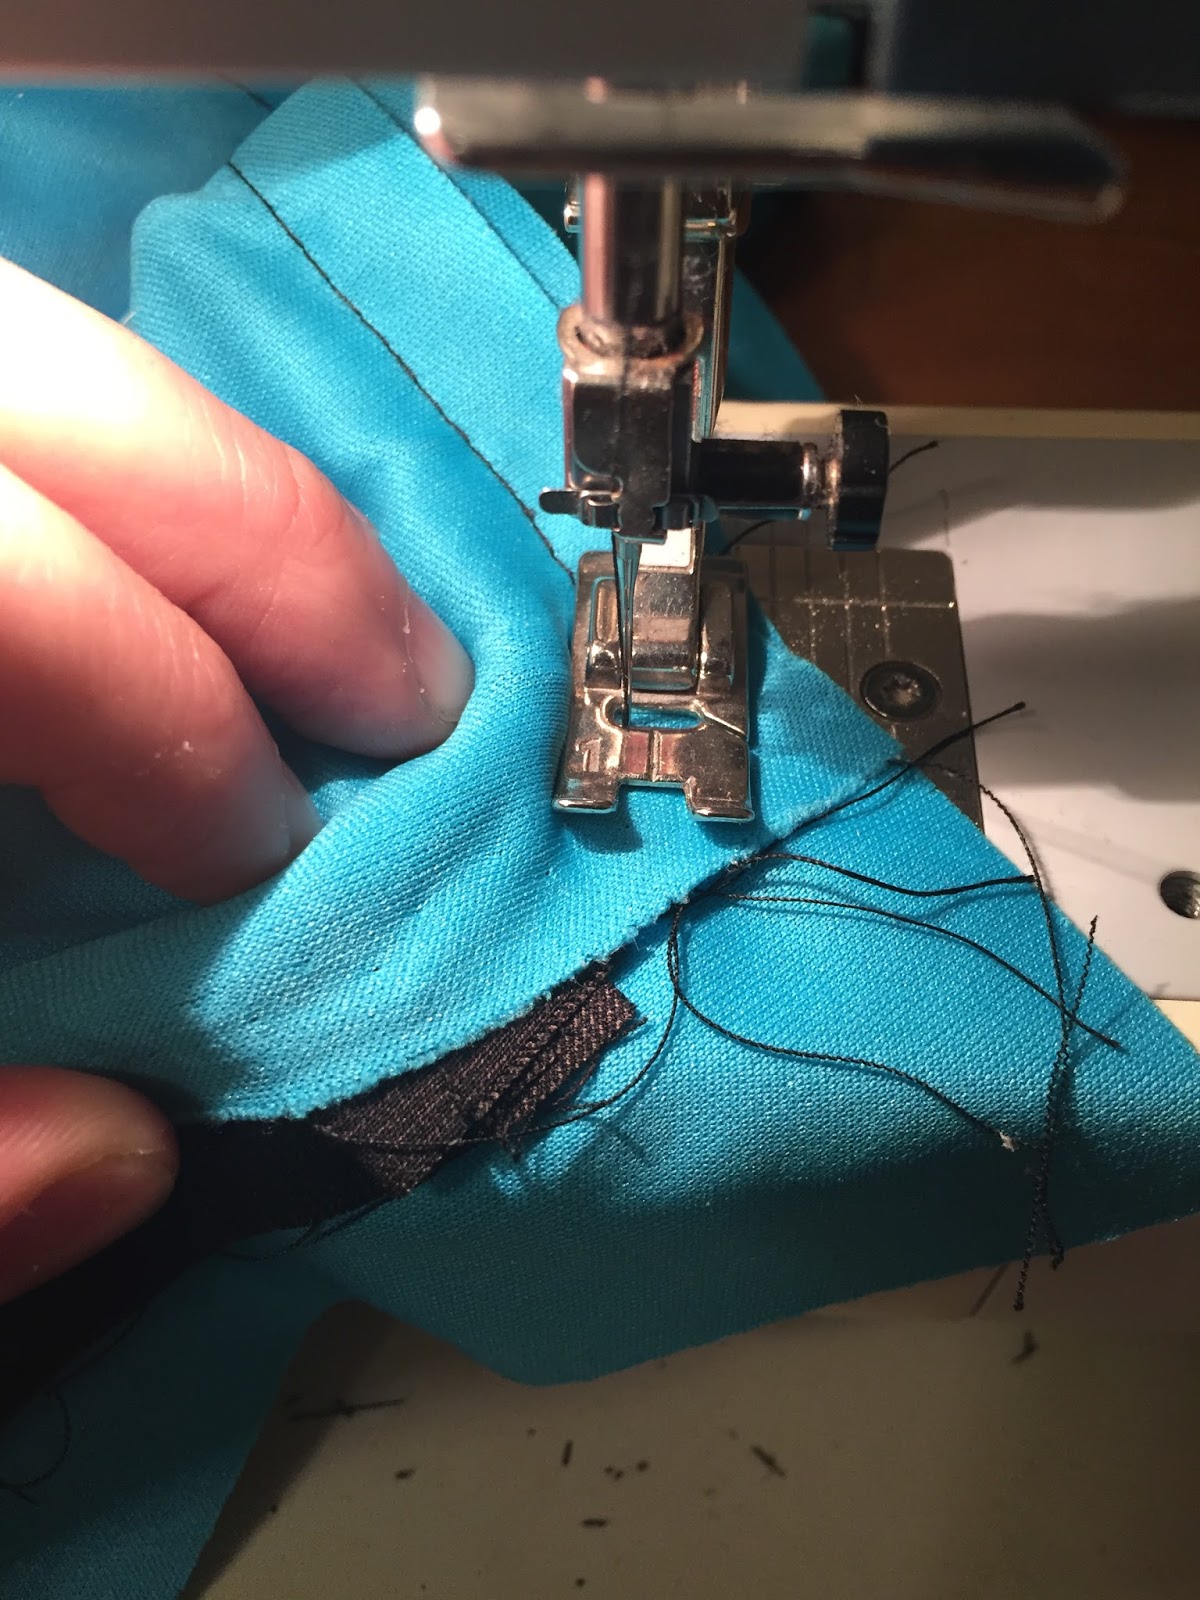
Fold over the fabric and sew the rope in.

Set the needle to maximum left most position and sew a straight stitch!


This is what it looks like once you have run out of fabric and need to incorporate more, easy!
3) Next step was two estimate the front and back fabric sizes. To do this I put the foam inserts on the chair and measured. Remember to leave room for your seam allowance and that this will essentially be a flat pillow so take into account the height of your foam for the edges. I ended up underestimated and made it a little too tight. Also the fabric I choose was very thin and really needed some padding in between the fabric and the foam. I didn't have any so I used an old towel (gray). This meant I had to sew this to the front fabric and since I didn't have any thread that was the electric blue of my fabric I decide that I would make this a "feature". So I used black thread and measured two very straight lines and sewed two straight stitches. See how I measured this below.


My fabric was about 24 inch wide, so i measured where my halfway mark was (12 inches) then measured two stripes 4 inches to the left and right of the center line. These two outside lines it what I would use to sew the straight stitches.

Adenine the cat approves!
4) Next step is to attach the back and the edging we made. Pin it all up together with the insides facing out!

Here we have the back panel on the bottom, then the edging with the cord facing inside, and the front panel on top.

Pinned together.

Once again sew right against the cord in the edging piece.

Going around the corners is kinda tricky, just go slow, you can do it!
5) I went 3/4 the way around so that I had an opening to shove the foam inserts in. Squeeze them in, and sew the top shut.

Here you can see that my cover is a bit tight and a bit too small, really had to stretch it to get it sewn shut.


Finished cushion!
6) The last thing I did was make the head rest, this chair had a separate head cushion, my other chair (coming up next) did not, so your may not either. If it doesn't then you are all done! I basically did the same thing for the head cushion that I did for the main cushions. It was getting late and it looks like I forgot to take as many pictures of this process as I would have liked, here is what have...


The curved part was hard, don't have a good solution for that, probably should have cut out half moon pieces for the sides. I didn't do this and that made things harder than it should have been.
All done!
Now for the second chair - this one was much easier because I decided to just cover the current cushion. I also did not include any edging which made it go fast, and the head cushion was attached so that was easy too. The other different part for this chair was the ottoman. It really needs the velcro strip on the bottom to keep the cushion on the ottoman.


Great chair but very fun faded original black fabric.

Locate the velcro on the bottom.
1) Here is the velcro on the bottom of the ottoman, use a seam ripper to take it off.

2) The ottoman was very simple, just two squares of fabric. Stitch the velcro to whichever panel you are going to have be the bottom. Make sure to measure roughly where the velcro should be so that your cushion lines up on the ottoman base.

3) Sew 3/4 of the edges, your velcro should on the on the inside of the sandwich. Then stuff the cushion inside the cover and sew the final edge shut. Ottoman done!

4) The main cushion is just as easy. Lay begin by laying out your fabric into two large rectangles.

Once again sew 3/4 of the sides, insert the cushion, and sew the final edge. Here I folded over the fabric twice to have a nicer edge since this edge would be more visible.


Nicer edge.

All done!
A few final notes:
The chairs originally had zippers on their cushion covers, I decided to not bother with this. This means I can't ever really wash the covers but this wasn't a huge deal to me. The chair cushions also had velcro like the ottoman but they didn't seem to need it so I didn't add the velcro strips to the chairs cushion. Finally, the comfort of the chair is really dependent on the batting under the fabric since fabric isn't inherently cushion-y. For the future I would buy some batting to line the fabric with. The brown chair with gray fabric didn't need it since it was more of a cover. But if you are totally stripping your cushion down to the foam I would highly recommend you buy something to go in between the outside fabric and foam.

Enjoy your brand new chairs!
~Andrew
No comments:
Post a Comment