Showing posts with label Bags. Show all posts

Saturday, February 20, 2016

DIY Beach Bag


Here is a great example of a slightly over-sized beach bag that is perfect for holding several towels and sunscreen and other fun-in-the-sun items! This is fairly straight forward to make as it is simply five rectangular panels sewn together, not too complicated to lay out. I embellished my bag with some fun chevron pattern on the bottom portion of the bag for extra flair that doubles as reinforcement for the bottom that will likely be tossed around and take the brunt of the stress of the bag.

I closely followed a tutorial for a Canvas Beach Bag on the Elle Apparel Blog that you can find here for more explicit instructions. http://www.elleapparelblog.com/2010/08/canvas-beach-bag.html

My bag is slightly different and instead of taking you through step-by-step how I made my bag I will simply point out how mine is different the the Elle Apparel bag. Please follow her instructions for step by step instructions on how to make a great bag. Thanks Leanne!

The dimensions for my bag was 16in(H) x 21in(L) x 7in(W)

What you will need:
- Two 16in x 21in rectangles (front and back)
- Two 16in x 7in rectangles (sides)
- One 7in x 21in rectangle (bottom)
- Two 30in straps

-Sewing machine, thread, pins

If you would like the accent color embellishment you additionally need:
- Two 6in x 21in rectangle (front and back)
- Two 6in  7in rectangle (sides)
- One 7in x 21in rectangle (bottom)

If you would like to add an inside pocket panel you additionally need:
- One 12in x 16in white fabric rectangle.
 

Steps:
1) Start by cutting all your fabric. If you are adding the accent fabric or the inside pocket, assemble these before assembly the sides together. Also hem all your rough edges. The blue fabric I used is a plastic fabric so I used a candle to gentle melt the edges to prevent fraying.  Here is the side with the inside pocket:

 As you can see it is simply a rectangular piece of fabric that I sewed a few straight stitches in to make the different sized pockets.


2) Sew the four sides together one at a time. Start with sewing the front to one of the sides, then add the back to the that side, the complete the front and back with the last side. This should leave you with a tube.

3) Attach the bottom. It should look like this:
(I took this picture after I had finished, we have not added the straps at this point) 


4) Now attach the straps. You can also use straps like this, rope, or stiff handles, anything you would like. The length is also totally personal preference. My straps were close to 30in each. Whatever you do, just make sure to really sew them to the bag, don't want anything to break!

5) My fiancĂ© loves anchors so I drew and then stitched on an anchor pattern on the outside with a wide set, short stitch length zig-zag pattern. 

I purposefully skipped over a lot of the nitty-gritty sewing steps here, please see the linked tutorial at the beginning of the post for more explicit instructions on a similar bag. Overall it is a pretty simple idea, just a bunch of rectangles sewn together to make a nice flat-bottomed beach bag.

Enjoy your new beach bag!

~Andrew

Make a simple stringbag


I have always used a string bag to take my gym shoes and clothes with me when I go to the gym. These string bags are simple little carrying sacks that can be used to carry just about anything, from a trip to the beach, the gym, or even light shopping. However, all the string bags I have ever had were just slightly too small, especially after I put my gym shoes in them. This would also cause me to wear out my string bags sooner because I was stretching them so badly trying to fit everything in them.  Therefore I set out to make a slightly larger string bag and it turned out great! Here is a picture of the finished bag next to a typical string bag that I had previously been using to help you get a sense for the size difference.


What you will need:
- 40in x 18in rectangle of plastic tarp like fabric. (or anything you like really)

- 16 ft of 1/4 in rope

- 2 grommets (I used 1in outer diameter and 1/2 inch inner diameter grommets, you probably don't want any bigger than this, could have gone with smaller grommet and thinner rope, but I wanted it to be sturdy)

- Thread, sewing machine, pins

- Candle (or other flame source) if you got a plastic fabric and/or rope


Steps:
1) Start by cutting out your fabric. The bottom of the bag will be the folded, not sewn, end.

2) Before you sew or pin everything, light a candle, or use a lighter, and gently melt the edges of the plastic fabric. This will prevent it from fraying badly. You should be able to do then gently so that you don't disrupt the shape of the fabric too much. Sorry I don't have a picture of this, I actually didn't do it the first time and my bag frayed badly and some of the stitches came out. So definitely do this BEFORE you sew and use you bag, it will make you life much easier. You want to melt the edge just enough so that is all gets fused.

3) Once your fabric edges are taken care of you are going to fold over the two short edges to make the pockets where the string will go through. I folded about 1 inch over and fastened it with both a straight stitch and zig-zag. These seams will be getting a decent amount of wear so I wanted to make it extra strong. Also make sure you make the pocket/hole big enough so that it can fit 2 passes of your rope through. This is what it looks like after the whole bag is assembled. (Ignore the rope, I took these pictures after I had finished)

4) At this point you should have a rectangle with the two folded over ends on the shorter ends of the rectangle. Now you should fold the rectangle in half so that those two sewn ends are together, making the shape of you bag. Make sure the insides of the bag are facing out and what will be in the outside faces of your bag are face to face. We are now going to sew the two sides of the bag. I did another zig-zag stitch here as well. (Ignore the rope, I took these pictures after I had finished)

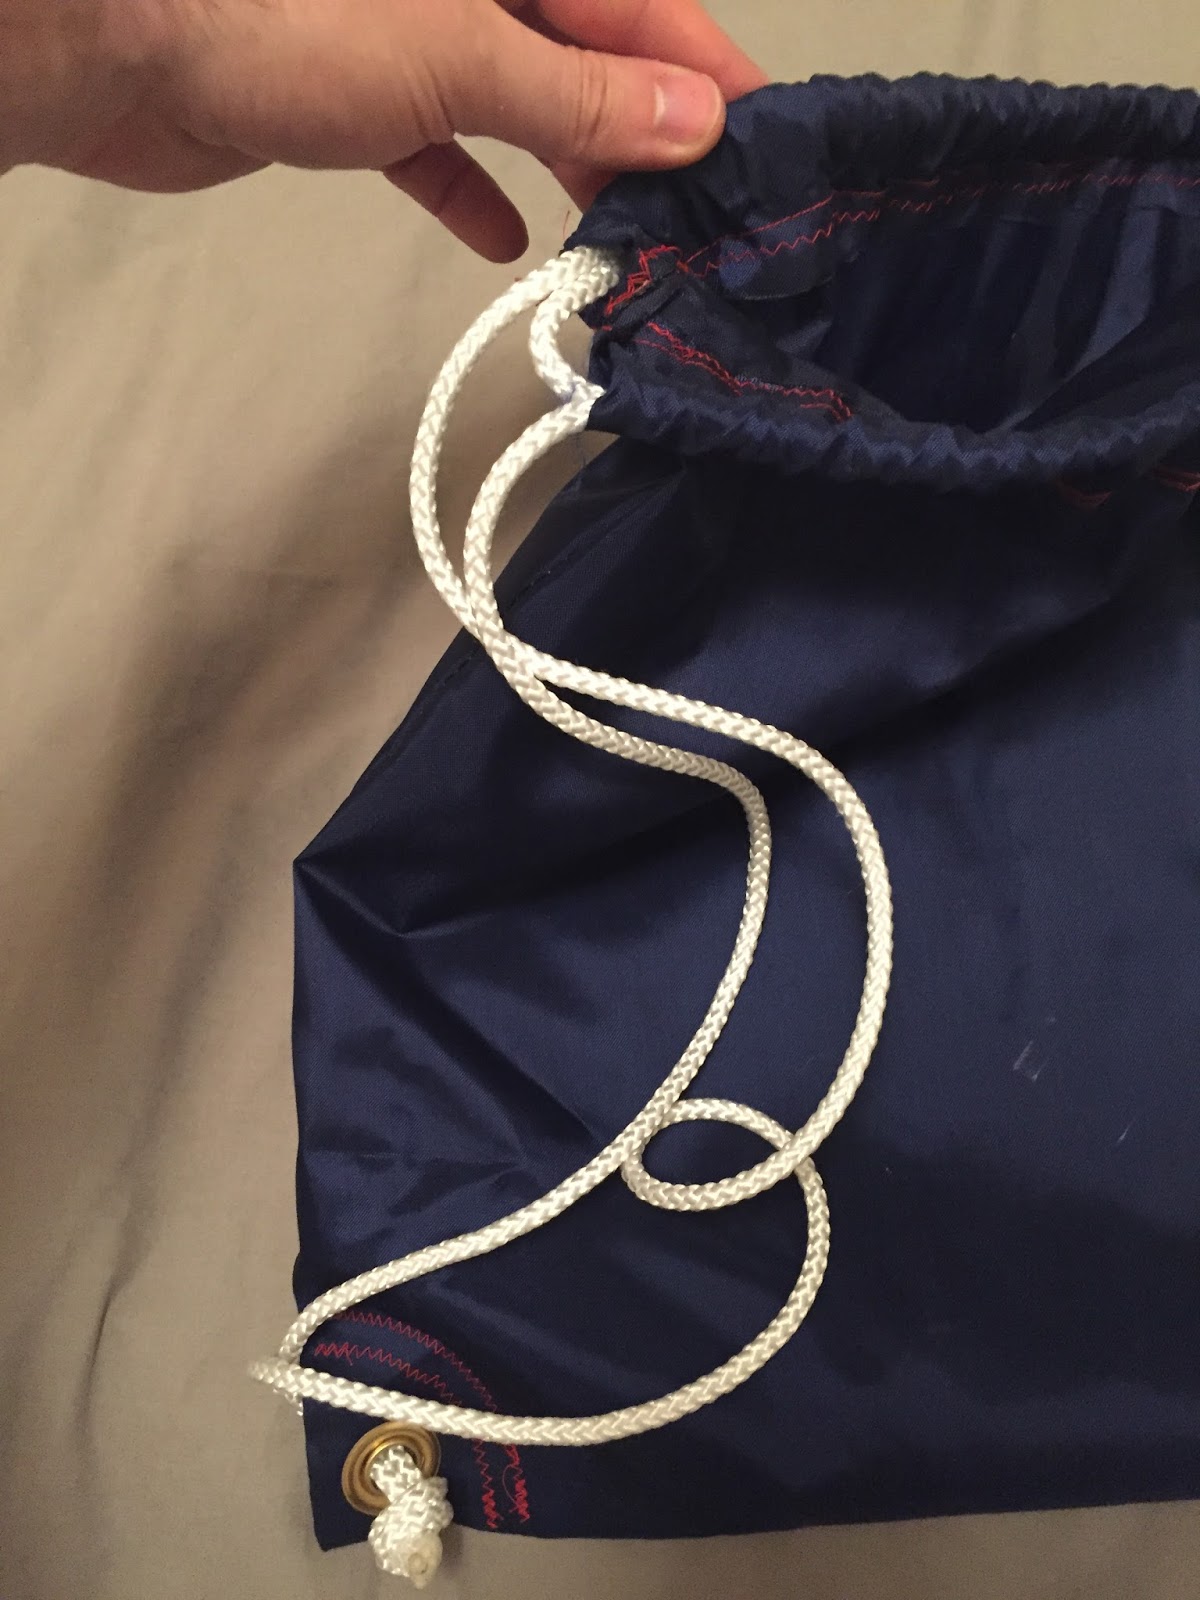
5) Now flip the bag inside out and admire your new string bag! Wasn't that easy. Now at the point we just need to add the grommets and thread the rope and the string bag will be ready for action. Follow the directions on the grommets to attach your grommets to the corner of the bags. I then sewed two rows of curved zig-zag stitches to provide a barrier between the grommet and contents of the bag. (Ignore the rope, I took these pictures after I had finished)


6) Finally time to stop ignoring the rope! I cut the rope into two 8ft segments. The string bag does not have one continuous piece of rope, instead it is two looping ropes. Basically one rope starts in corner number one, goes through one pocket, then turns around and goes back through the other pocket to come out on the same side of the bag it went in on (but through the opposite pocket) and ends at the same corner where it started. The other string does the other side of the bag. It is fairly obvious once you have it strung how it works, but it is a little hard to explain. I hope the pictures help.


You are all done! Enjoy you brand new, slightly larger, string bag!

~Andrew